Tuesday, December 26, 2017

Quick Tip: How To Stamp on Kraft Cardstock


Hi!

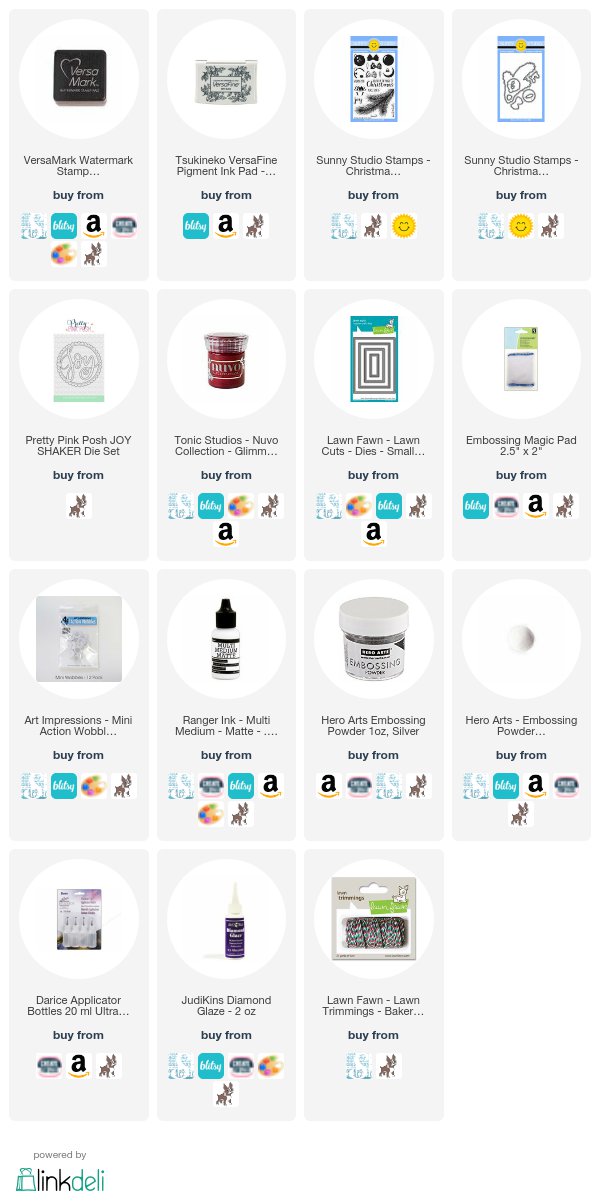
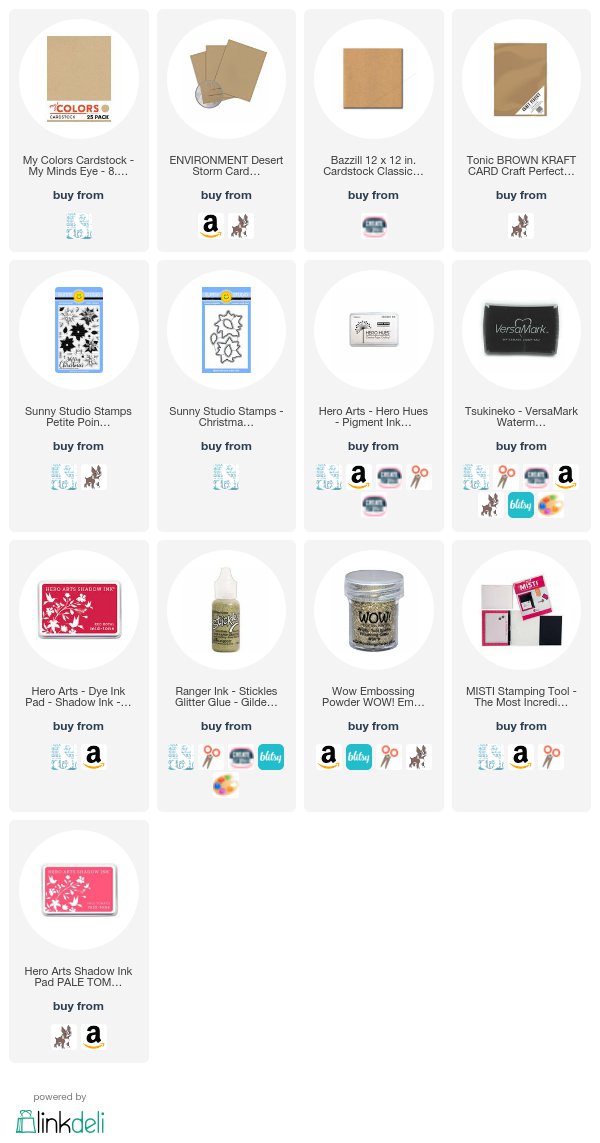
I hope all of you enjoyed a wonderful holiday and wishing you a Happy New Year!  Let's get going on those thank you notes!  Here's a way to stretch your dye inks to use on kraft paper featuring Sunny Studio's "Petite Poinsettia" stamp set...  If you enjoy this YouTube video, please click the subscribe button over there:)

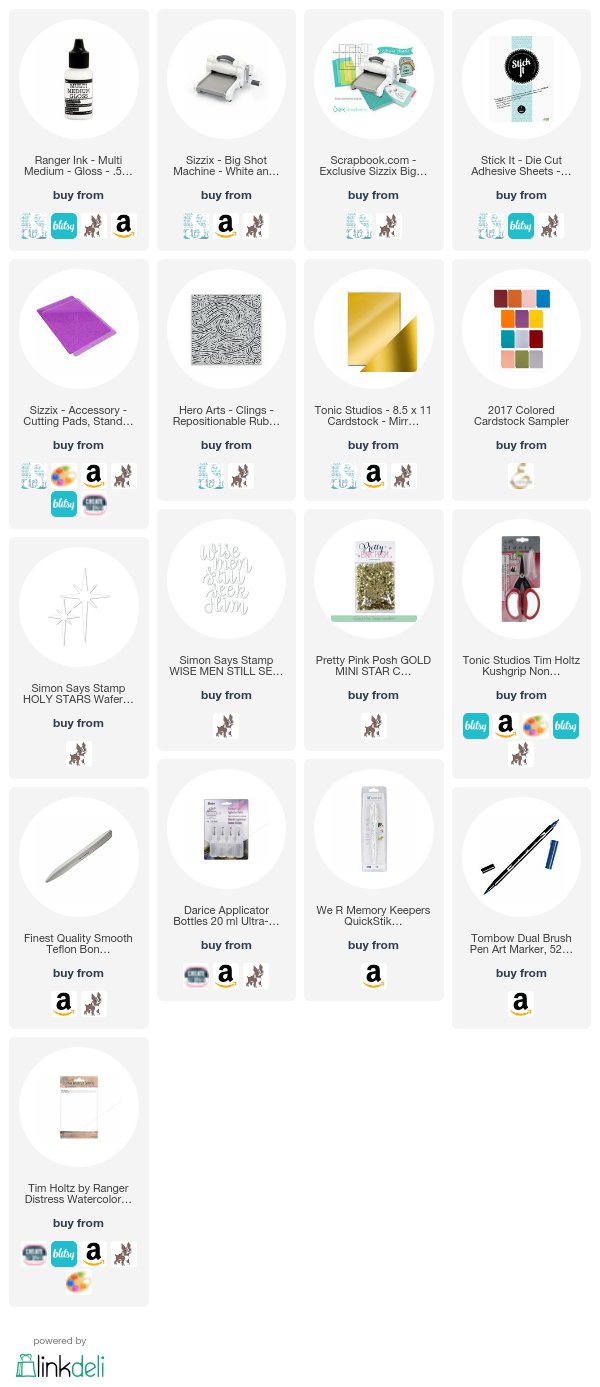
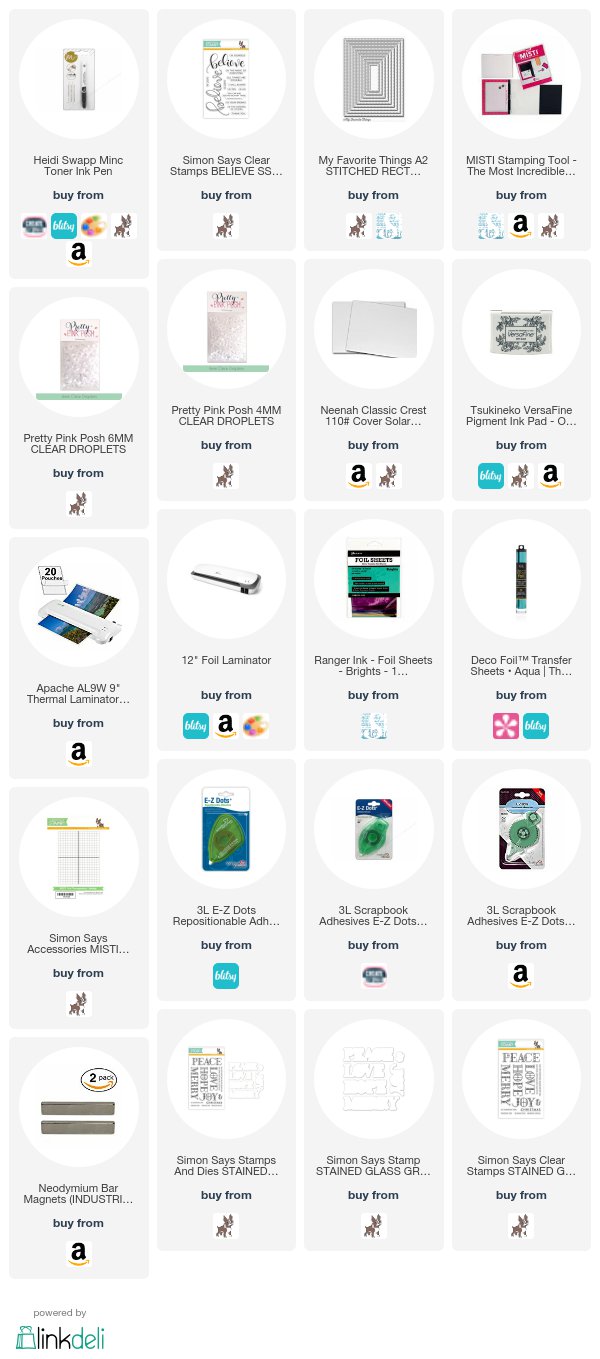
The supplies are listed below:


Here is a regular photo:


Until next time,

Gale

Saturday, December 16, 2017

My Christmas Wishes For You! 2017


Hello!  

Just wanted to take (under) a minute to say you "in person"...


Looking forward to a great 2018 for everyone!  Celebrate, but stay safe!

Gale

Friday, December 8, 2017

Prismacolor Reindeer Games!

Hello Everyone!

I've been in technological purgatory this last week!  That with some family health issues that are now improving, I was off the grid for quite awhile.  We lean on tech equipment to cut time and money, but if it isn't working, you are the one cut off from society!  A real double-edged sword.

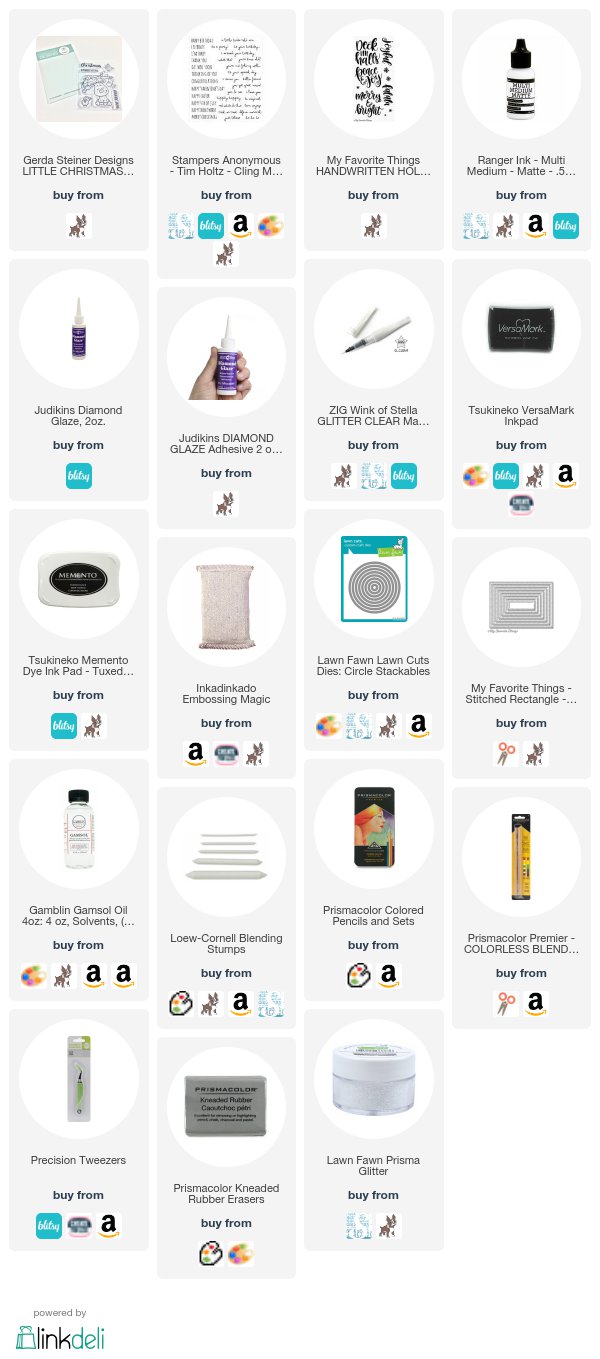
This video is a Christmas Miracle that it ever got finished!  I hope you enjoy it and maybe even learn a tip or two.  The YouTube link and supply list are down below!  BTW, I haven't gotten a single card out yet... Have you?


This card features a Gerda Steiner set. "Little Christmas."  I love her whimsical style!  I plan to order more of her things in the future!


Get those cards out!!!

Gale

Sunday, November 19, 2017

Sunday Quick Tip: Faux Stained Glass (Coloring Vellum)


Hi!

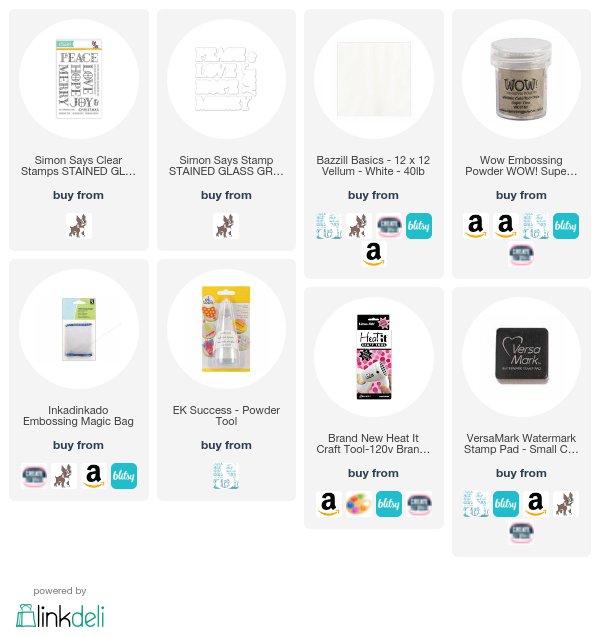
Here's a super easy and fun card--mass produceable!  Just keep layering!!!  Supplies are listed below.

Just published this YouTube video with all the instructions, plus other tips!  Enjoy!


Card features Simon Says Stamp "Stained Glass Greetings"


Have a great day and get those Christmas cards done!!!

Gale

Thursday, November 9, 2017

Jinglin' Bell Card + "Dare to be Different" Tip!


Hi everyone!

Folks, it's time to get your Jingle on!  Get Christmas card making!  I run late every year.  This latest Youtube tutorial is full of tips and tricks!  Please comment below if you prefer the bell with the Diamond Glaze or the clear embossing.  Most of the products I used are listed below from several places for you convenience.


This bell from Sunny Studios is the most realistic I've seen!
I love hearing from you!  Let me know what you would like to see in future videos!

You are welcome to subscribe by several ways on the right sidebar--and be sure to visit the archive of many, many previous posts!

Until next time,
Gale


Monday, October 30, 2017

Mirrored Paper Inlaid Christmas Card

Hi!

Here's the latest YouTube video!  Enjoy!  All of the supplies are listed below...


and a photo without the arrow in case you want to pin...

Watercolor with Saran Wrap background will be shown in a future video.  But don't these diecuts look great???

Please excuse a few seconds of extra close up on video, I must have hit a button while editing:)


Have an awesome day!!!
Gale

Sunday, October 22, 2017

Sunday Quick Tip: Fast Foiling!

Hi!  

Just posted a new video on YouTube!  Very brief and easy peasy to do!


It's hard to see the shiny-ness in this photo, but it comes through on the video!

Here are the supplies I used!


Hope you try it soon!  Have a great day!

Until next time!
Gale

Thursday, October 19, 2017

This Is Load Of ...Well...Crap!!!

Hi!

Disclaimer:  I ordinarily don't write about indelicate matters, but if by sharing it helps someone it's worth it.  I also don't in any way mean to make light of a very scary topic, but "a spoonful of sugar" can make most anything easier to take.  (Besides, any puns wrote themselves...)

When I was the big 5-0 I went in for that dreaded colonoscopy.  It is a pain in the rear in more ways than one, but the alternative seemed worse.  The actual procedure went fine (I guess) but there were a lot of other parts to it that didn't go well.  I'm not going into details, but when I was scheduled to repeat the event, I decided that there had to be some other way as it just wasn't for me right now.

I saw a commercial for Colonguard and asked my doctor to get me one with the promise if it showed anything, I would go get the regular test.  A few days later a box appeared on my doorstep.  I of course let it sit around awhile (indoors!) while I geared up for it.

When I finally opened it, there was a scary-looking half inch thick manual with the most detailed instructions I've ever seen.  Fortunately, a quarter inch of it was in Spanish.  The book was thick because the print and illustrations were huge.  I will spare you the details, but I can't imagine after reading it (or even looking at the pictures) anyone could possibly screw it up--just a certain order blah, blah, blah.  It's not something you would want to do before you rush out the door for work, so another few days went by.

Finally, D-Day came because I was determined to get this off my to-do(do) list!  You have to ship it overnight priority within 48 hours.  Didn't think too much about having to ship it back...why can't they just do this at the local lab?  You reuse the box it came in.  The container is thick enough to shield nuclear waste and it goes in a thick Ziplock bag, so really no danger of anything leaking, etc.

You could call for a pick up (this is would be a great way to deter package thieves...imagine their surprise!) That wasn't happening.  I normally drop UPS stuff off at the local Pak Mail, but as I got in the Jeep I began to re-think this as I go there a lot.  The alternative though was to waltz it clear through to the back of the hardware store that subs for UPS, with employees greeting you every few steps.  I'm driving hoping that I wouldn't get in an accident that the box couldn't sustain, imagining being killed while packing a box of poo, when I decide to drop off a letter at the post office first.  (One bright side, if my package had to be returned by regular mail, they actually ask you what's in it!)

Then what to my wandering eyes should appear????  A UPS guy making deliveries next to the post office.  I pull in.  It's not really sunny, but I'm wearing large sunglasses, thankful that the box's mailing and return addresses are the same--my name is not on it anywhere.  It doesn't say anything about what it is.  However, it dawns on me that maybe I shouldn't have gotten the personalized plates! He saw me pull in, but had already taken a load of boxes into what apparently is an office building. He took several minutes and I felt like a stalker. Fortunately, he's not on my route so I won't likely see him again....

He returns and graciously accepts my precious parcel (hopefully, not knowing what was in it) and off he (and it) goes.

I thought I would get the results in a week or so...Well, it's been almost a month and no results.  However, my Blue Cross insurance did post that they got a bill for $640 and that they weren't gonna pay anything.  Really???  I agree the bill is outlandish, but still it has to be way cheaper than the regular procedure.  It never dawned on me it wouldn't be covered, so I didn't even ask.  (Hindsight really is 20/20!  Sorry, couldn't help myself again....)

Well, I call Accolade, my insurance advocate service, and was told that, nope, it's not covered.  She suggested I call and try to negotiate for half of it, which I will when I finally get the bill in the mail.  (Probably before I get the results...hope this means I'm fine or otherwise I could be dead before I find out!)

I will let you know if and when I find out a) the results and b) the final bill!

Another lesson learned the hard way...Do any of you have thoughts or suggestions?

Until next time,
Gale

Friday, October 13, 2017

"Shape-Shifting" Treat Bags --Halloween YouTube Hop with Free Download!


Hi everyone!

Welcome to our Friday the 13th YouTube Halloween Hop!  

It's time to prepare for all the little beggars, so I thought I'd share a cute treat bag, customizing Waffle Flower's Gift Bag Die (linked below)!  The regular size is perfect for class parties, but more is better (especially when involving treats!) so I made a bigger version while still using the same die set!  

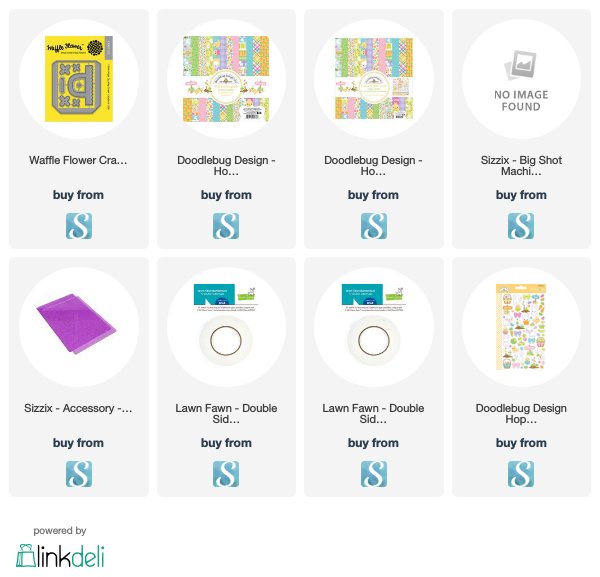
All the supplies used in this project are linked below from several shops to give you lots of choices!  The free downloadable template is also there!  Enjoy!

I also am excited to welcome Gina K. Designs, Hallmark Scrapbooks, Amazon, Studio Calico, Studio Katia, Thermoweb, Honey Bee, Create For Less and Pink & Main as new affiliates!  I hope you'll visit their links on the right sidebar! Thank You!


Shape-Shifting Treat Bags

A larger photo of the final projects!

The Youtube tutorial link:


Please visit all the stops below as everyone has worked hard to give you a fun and informative trip!


Christine Meyer
https://youtu.be/7azR0ADzljU
Becki Adamshttps://youtu.be/wXNAbPOcHAw
Monica Monge-Taylorhttps://youtu.be/LxGQCJKVlS8
Keren Tamirhttps://youtu.be/VDn-yIVDwig
Gale A. Williams-Thompson: https://youtu.be/M24jxCbpnKk  You are here!

Erin Reedhttps://youtu.be/Rghc3FB2U0k


(Must be printed on legal size paper (8.5 x 14")

Supplies used in this project:


I hope you try this project and enjoy the hop!  Don't forget to subscribe if you would like to see more tutorials!  I love comments and suggestions too!  Thank you for stopping by!

Until next time,
Gale

Friday, September 29, 2017

Five Favorites For Fall Blog Hop (Craft Products!)

Hi Everyone!

Thanks for stopping in to my first ever contribution to a blog hop!

All supplies are linked at the bottom of this page for your convenience.  There are also other Fall projects sprinkled throughout my blog from past years... Enjoy!


Youtube tutorial link:


Hi and Welcome to our Fall Youtube Hop. We are each really excited to showcase our 5 favourite products for fall and we've each created a video for the hop. Some of us are even having some awesome giveaways. Hop along with us through all the videos. It doesn't matter where you start you can just hop along for a ton of inspiration. Here is the list of videos below:


(Shameless plug:  I joined Amazon as an Affiliate recently.  Everything you purchase through the portal on the right margin helps out The 'Creek through a small commission!)

Please hit "like" and "subscribe" both here and on my YouTube channel if you would like to see more!  I love comments too!

Until next time,
Gale

Fall projects can be found throughout the 'Creek:


Saturday, September 9, 2017

Glow-In-The-Dark Pop-Up Boxes + Giveaway!!!!

Hello everyone!


9/17/17:  The giveaway winner is....Viola Leary!  Please contact me with your address and I will ship this asap!  Congratulations and enjoy!


I'm excited to present my first YouTube tutorial!  I am amazed at how many folks have watched the "cave" tour and am so thankful!  While you are at YouTube, please like and subscribe.  I also appreciate feedback.  Liking it on the YouTube site helps build my channel.  Be sure to comment at bottom of post to enter drawing for a bag full of treats!  I will draw on 9/16/2017 and post it here on the blog.  Good luck!


Anyway, here we go!!!  To keep the posts short-ish, the instruction steps are on the video!  The products I used are linked at the bottom of this page if you are interested.

From this.....

This features Lawn Fawn's Scalloped Pop Up Box Die set.  

To this....
The middle area of this is where I hid some glitter behind the ghost's bow tie as an afterthought.

I had a lot of fun making these (even though it took several video takes!)  One of the things I couldn't show and ever get it done was the vellum ghost.  You can glue them direct to paper without the adhesive showing as long as you get an even layer of glue over the entire back of the piece.  (Running through a sticker maker would work as well.  I had some issues with my glue and didn't want to re-make background, so went with monsters.  Here is an example from a previous post to illustrate when it works correctly!  It is sheer like a ghost!

I was pretty proud of getting the look I wanted!  Vellum is hard to work with!

Here is another popup box example:

This dozen box of donuts is from Lawn Fawn's "Donut Worry" mini set.  I used vellum to replicate the baker's tissue.  These were colored with Copic markers.
I am doing a unique giveaway....one "lucky" winner will get the bag below full of surprises...but will it be a Trick or a Treat????? 

Just leave a comment below to enter drawing.  I will announce the winner one week from this post and email the winner as well.  Unfortunately, for now I can only send to U.S. residents:(  OK, apparently there are "scaredy cats" out there who need to know what the prizes are:  there are a ton of stamps, a Starbucks gift card, many colors of baker's twine, a couple of Zig Real Brush markers, some glow in the dark glitter and more!


Until next time,
Gale

Sunday, August 27, 2017

Finally! The "Craft Cave" Tour!!!

Hello friends!

As promised, you are now invited to go spelunking in my craft room.  It's not glamorous, but perhaps you will find an idea or two that works for you no matter what you're crafting.  I took some before shots last year (did I say it was a slow process???)  The rest of my downstairs looks like a war zone and I feel a bit guilty--but I have my priorities!!!


It started as a hot mess... (scroll down if you just want to see the video!)


The girls kept me company in this process--it's not the same without my "Chin Chin" on the right.  I miss her so much!


Then the room started to take shape...


This is right behind my desk and is ever evolving to be more efficient.  I'm too lazy to get up all the time and chase stuff down!

Still nowhere nearly finished and productive, but getting there...

Drum roll please... the tour video!


Come back to see my first tutorial video on YouTube soon!  Please hit like and subscribe both here and on my YouTube channel:)

Until next time, 
Gale

Thursday, August 17, 2017

It's the Great Pumpkin Blow-Out at Glass Axis!


Hi!

It was a hot and steamy night in Downtown Columbus at the Glass Axis.  My hair was getting frizzier by the second.  Donna and I had so much fun with the ornaments we signed up for another class and invited a friend Linda to join us.  This time we met a different instructor, Matt, and made pumpkins (well, at least a good chunk of it--pardon the pun...)


A selfie of three hot ladies--and I do mean hot!  They had fans, but we still melted.  L-R:  Gale, Donna and Linda.  The fourth class member was a fellow that we let go first so he wouldn't have to set through all of us.  The class lasted one and a half hours for $69 each person.

I will post a photo of all of our pumpkins when we get them next week.  They have to spend a couple days cooling off (as did we...Whew!)  The weather didn't do us any favors as we stood in front of a 2200 degree "glory hole."  We picked entirely different color schemes, but in the photos, they of course all were hot and orange!  Donna went with mostly clear and transparent orange with white specs, Linda chose a deep purple and I did transparent orange with swirls of opaque orange and yellow.

I can't wait to see my pumpkin once it's cooled!  It's hard to believe the stem is actually two shades of green!


Here I'm blowing in the glob of glass to press it up against the walls of the mold--thus giving it the characteristic pumpkin shape.


Back into the "glory hole" for one last heating...


Come back next week and see the three pumpkin masterpieces!  I will put photo at the bottom of this post.

Left to right:  Mine, Linda's and Donna's.  Aren't they beautiful???

One piece of advice...go in January!!!!

Until next time,

Gale


Monday, July 31, 2017

Howdy from The 'Creek!


8/16/17 Update:)  Heading off tonight to blow up a pumpkin...craft cave tour video is "in the can" and I will pair it up with a tutorial next week...also a restaurant review on the docket....stayed tuned!!!

G


Hello all!

I hope this finds you well and enjoying your Summer!  I will return shortly with new posts. However, there are the crafting pages are getting updated periodically.  We recently finished the "Craft Cave" tour, so prepare to go spelunking soon!  I am going to start a YouTube channel, so stay tuned!

Please peruse the tonnage of previous posts until I return early August.  You can search several ways on the right sidebar.  


I have been doing some major projects around the house while working full-time.  I also won't post something just to post something, as I prefer quality over quantity.


Thank you for stopping by The 'Creek and come back soon!  Be sure to subscribe so you don't miss any posts!

Until next time!

Gale


Thursday, June 22, 2017

A "Little" More Daring Bucket List Item Checked Off!

Hi everyone!

As it turned out, glassblowing was potentially more dangerous than this, but Audra, Taylor and I went ziplining at Soaring Cliffs in the Hocking Hills of Southeastern Ohio yesterday.  The trip started out a little depressing as I ran over an indecisive squirrel circling on the road while picking up Taylor at OSU, but there wasn't time to stop.  I had to drive by the murder scene two more times that day:(

So getting there wasn't half the fun in this case.  But it was a lovely day, not as scorching as we have had and the rain held off until we headed home.  We really didn't know what to expect, but a good sign was the nice clean restroom trailer in the parking lot!  This is a two-plus hour tour--so don't drink a lot of pop or whatever on the way as this is your only chance until you're back to your car...

It isn't a cheap date at $80 a person plus tip, but our guides Sydney and Chance were professional and fun, everything was very safety-oriented and they only do small groups once an hour so you can enjoy the quietness of nature (when you aren't laughing!)  I would suggest bug spray--I had on sunscreen, but we weren't in the sun that much...wish I had a good sunscreen with bug spray in it! Not that we saw ticks and mosquitoes, but in the deep woods they had to be around. This takes zero experience and the only athletic ability you need is to be able to walk up and down some short, yet lumpy paths sometimes straight uphill.

About halfway through we stopped at a cave and got a water while they started a fire for hotdogs and marshmallows if you wanted them.  Chance said the hotdog was $80, but the ziplining was free...

One of the lines is nearly 1/4 mile long and eight stories high--plenty of time for doing tricks if so inclined.  None of it was scary, but Sydney hooked up a fellow who wanted to jump backwards and just as he jumped she yelled "OH NO!!!"  We all laughed but the guy...

Another line they had us play corn hole...I missed by a mile, but Chance was pretty close.  He always went first to work the brake and catch us.   Taylor was pretty comfortable doing front flips and going upside down.  Audra did a front flip as well, but I didn't know until too late to get the camera out.  I wouldn't take my phone, but Sydney secured my camera strap.  However, there are no photos/videos of me---darn!  I did nothing exciting though, so no loss.

Since a picture is worth 1,000 words and videos more...here is your armchair tour!

Taylor falling off cliff backward.
Sydney adjusting Audra's gear at the corn hole line.
Chance getting ready for Taylor's landing.
Snack time!


Sydney explains about native plants.
and now the short videos...


Taylor does his front flip.


Audra's turn to go...


So if you are looking for something different to do, I would suggest you give this a try.  They take reservations, but walk-ins are welcome too.  Hocking Hills is known for it's camping and other outdoor activities, so most people stay there a few days.

Until next time,

Gale


Saturday, June 3, 2017

The Bucket List: Having A Ball Blowing Glass!

Hi All!

Can you believe it's June?  It's been years since I posted my "bucket list," mainly because not much has changed...until today!  My friend Donna Smalley and I went to Glass Axis near downtown Columbus, Ohio in the Franklinton District.

I've been kicking around wanting to do this for many years and decided "if not now, when?"  It was also something Donna had also wanted to do for years.  I wanted to start with the pumpkin, but Donna felt we should have balls first...LOL, pun intended!  The ball (actually ornament) class only costs $39 and they only book four folks for a one hour class.

We got there early and had a chance to see a "professional" glassblower although I don't think it was his day job.  It's interesting to note that they always work with a partner because they just don't have enough hands and you have to keep the glass moving.


This is the same vessel, but he flattened it out.  They still use tools like a handful of newspaper to shape things!

Our instructor Lisa was great.  She was thorough and very patient.  She had a positive attitude and it became apparent that she wouldn't let you down--you would be taking home a glass ball one way or another!  Well, eventually take home.  After forming, they have to go to an annealer to cool down slowly or they will crack.  So our balls won't be home for several more days...

This was just what I needed to cheer me up after losing my sweet Truly, the Japanese Chin I've periodically mentioned.  It was unexpected and a shock that one can only get under control, but never over completely.

Donna shaping her ornament.

Me heating up glass while looking in the "Glory Hole."

The actual blowing of the glass.
My glass "baby" resting on some batting waiting to have clear loop applied.  It will look different after it cools.

This is what my new little baby looks like after its 2 day cool down...

A memento of the experience.  They have quite a sense of humor (and fabulous vocabulary!)

After our stressful and arduous class completion, we went to the nearby Spaghetti Warehouse for a lunch in the trolley car!  I have to laugh because their website is meatballs.com!


I am planning to check off my next "bucket list" item in a few weeks--this one even more daring!  Stay tuned!!!

Until next time,
Gale